Why Refinish Instead of Replace?
Adirondack chairs occupy a special place in outdoor living. Their wide armrests cradle a cup of coffee, their angled seat welcomes tired backs, and their weathered slats seem to collect stories—summer barbecues, autumn bonfires, and spring mornings when the world still feels cool and quiet. Over time, though, even the most beloved chair begins to show its age. Sun bleaches paint into powder. Rain raises grain and peels finish. Seasons create cracks that almost seem like smile lines from years of good use. Instead of discarding a chair that has earned its history, refinishing allows you to keep it alive. With attention, a little effort, and the right sanding process, you can revive the original tone or completely reinvent its look. Refinishing is not just maintenance; it is craftsmanship. It puts control into your hands and transforms your outdoor furniture into pieces you feel proud to display. This article is designed as a comprehensive and highly usable guide. Whether you’re refinishing a low-cost pine chair or a premium teak heirloom, you will learn how to sand properly, remove old coatings, choose finishes that last, and bring out grain structure in a way that feels both practical and polished. Every step is written clearly, with reasons behind the method rather than just instructions. A refinishing job done well can last years—and the right technique ensures your Adirondack chair looks better than it ever did the day you bought it.
A: Not always. If the old finish is sound and just dull, a light sand and fresh topcoat can work. Strip or heavy-sand peeling, cracked areas.
A: Use a small detail or mouse sander on gentle curves, but switch to hand sanding on tight radiuses and edges.
A: For most woods, 150–180 grit balances smooth feel with good stain absorption.
A: Work in small sections, keep a wet edge, and back-brush along the grain before moving on.
A: Paint gives bold color and hides imperfections; stain shows grain and is usually easier to refresh later.
A: Yes, once the wood is fully dry and seasoned—often several months—then sand and finish as usual.
A: Good prep, thin coats, and periodic cleaning and touch-ups are the key to long-term success.
A: It’s ideal but not mandatory. At least tape over bolts and metal details to avoid drips and corrosion.
A: Yes—sprayers are great for slats. Just remember to back-brush to work the finish into the grain.
A: Once the surface is dry to the touch you can move it, but wait a few days of cure time before regular, heavy use.
Knowing Your Chair: Wood Type, Age, and Surface History
Before sandpaper ever touches wood, there is value in investigation. Adirondack chairs come in many wood species, and the right approach depends heavily on what you’re working with. Pine and fir are common in budget retail chairs. They are soft, eager to dent, and absorb stain quickly, often unevenly. Cedar is stronger and naturally weather-resistant. Its aroma emerges as you sand, and its reddish-amber tone shines under oil. Teak and ipe belong to the hardwood elite, dense and nearly stubborn to finish, but when done correctly they create furniture that lasts for decades.
Age also matters. A brand-new raw-wood chair only needs preliminary sanding before finishing. A chair that has lived outdoors, faded by sun, flaked with paint, or dulled with mildew demands a different approach. The old finish must be removed fully, not just dulled. Uneven sanding leads to blotchy stain, visible scratch patterns, and swelling of the grain over time. This is why sanding—from the first rough grit to the final buffing—is the heart of refinishing. It can transform warped texture into a velvet-smooth surface ready for stain or paint to absorb beautifully.
Training your eye is useful: run your fingers across the armrest. Do you feel ridges? Does paint flake like eggshell? Does the surface look fuzzy or gray? These are signals of weathered fibers. Sanding will cut through them cleanly, revealing fresh wood with clarity and luster. The goal is never merely to remove a finish. It is to reveal structure beneath it. That mindset changes everything.
Step One: Cleaning and Preparing the Surface for Sanding
Before sanding, the chair needs to be washed. Dust, sunscreen residue, oils, and mildew all interfere with abrasives. A simple scrub using warm water and mild detergent works well. For mildew, diluted white vinegar or oxygen bleach can lift discoloration without damaging wood. Pressure washers should be used only with great caution—high pressure fibers the grain and creates work later. A gentle rinse, a soft-bristle brush, and patience beat brute force every time. Allow the chair to dry completely, ideally for twenty-four hours in low humidity. Working on wet wood gums sandpaper and traps moisture beneath finish layers. Refinishing is a rhythm: clean, dry, sand, restore. Each step prepares the next. Skipping none ensures your results will last.
Step Two: Disassembling (Optional, But Valuable)
Many Adirondack chairs are held together by screws that can be removed easily. Though sanding can be done with pieces assembled, disassembly offers clear advantages. It gives you access to tight spaces between slats, prevents accidental rounding over edges, and allows every surface to be refinished evenly. The difference is visible—not just on day one, but years later when inconsistencies in finish thickness often cause patchy wear.
If you choose not to disassemble, that is okay. You will simply spend more time with detail sanding later. The key is awareness rather than perfection. The more surfaces you can reach, the more uniform your final finish.
Step Three: The First Sand—Removing Old Finish With Coarse Grit
The first sanding pass is where transformation begins. Coarse sandpaper, typically 60- or 80-grit, strips away peeling varnish, lifts gray weathered fiber, and levels rough surfaces. The goal in this stage is not smoothness but removal—getting beneath the old finish until fresh wood emerges evenly.
Use a random orbital sander for broad surfaces like arms, seat slats, and backrests. Move slowly, overlapping passes, never pushing the tool aggressively. Let the abrasives cut at their own pace. Pressing harder does not work faster; it only scars wood and creates swirl marks that reappear under stain like shadows.
Hand sanding is invaluable around curves. Adirondack chairs are not flat furniture—they are sculpted to hug the human body. These shapes demand care. Wrap sandpaper around a foam block or use flexible sanding sponges. Work with the grain instead of across it. Every scratch you introduce now must later be removed by finer grit, so the cleaner your technique, the less work comes after.
Expect dust. Expect sweat. Expect satisfaction when gold-colored wood begins replacing dull gray weathering. This is the moment many owners fall in love with the process—the rediscovery of wood beneath erosion feels like revival.
Step Four: Intermediate Sanding—Refining Surface Texture
Once the old finish is gone, the second sanding stage begins. Move to 120- or 150-grit paper. The purpose now is refinement. You are no longer removing material; you are shaping it. This grit removes the scratches left by earlier coarse sanding and begins smoothing the grain so the final finish absorbs consistently. Run your hand along a sanded armrest. You should feel progress: less roughness, more silk. You may notice areas where coarse grit didn’t cut deeply enough. These should be returned temporarily to the previous grit. Sanding works like sculpture. Each pass builds on the last. If a mistake is not corrected now, the final finish will highlight it rather than hide it. Do not rush this phase. It determines the final feel of the chair more than any topcoat or stain. A surface that is sanded consistently here will produce a finish that looks professional, not patchy or novice.
Step Five: Final Sanding—Preparing for Finish Absorption
The last sanding stage uses 180- to 220-grit paper. This is your polish stage. It removes faint micro-scratches and prepares pores for stain, oil, or paint. The wood should feel almost soft beneath fingers. Run your palm flat over slats, searching for raised grain, ridges, or slight sharpness along edges. Adirondack chairs invite bare skin, so every edge that touches a forearm or back deserves to feel smooth, calm, and deliberate.
When sanding is complete, remove dust with a tack cloth or vacuum with a brush attachment. Dust left on the surface will interfere with stain penetration and lead to gritty texture. The cleaner the surface, the more seamlessly the finish binds.
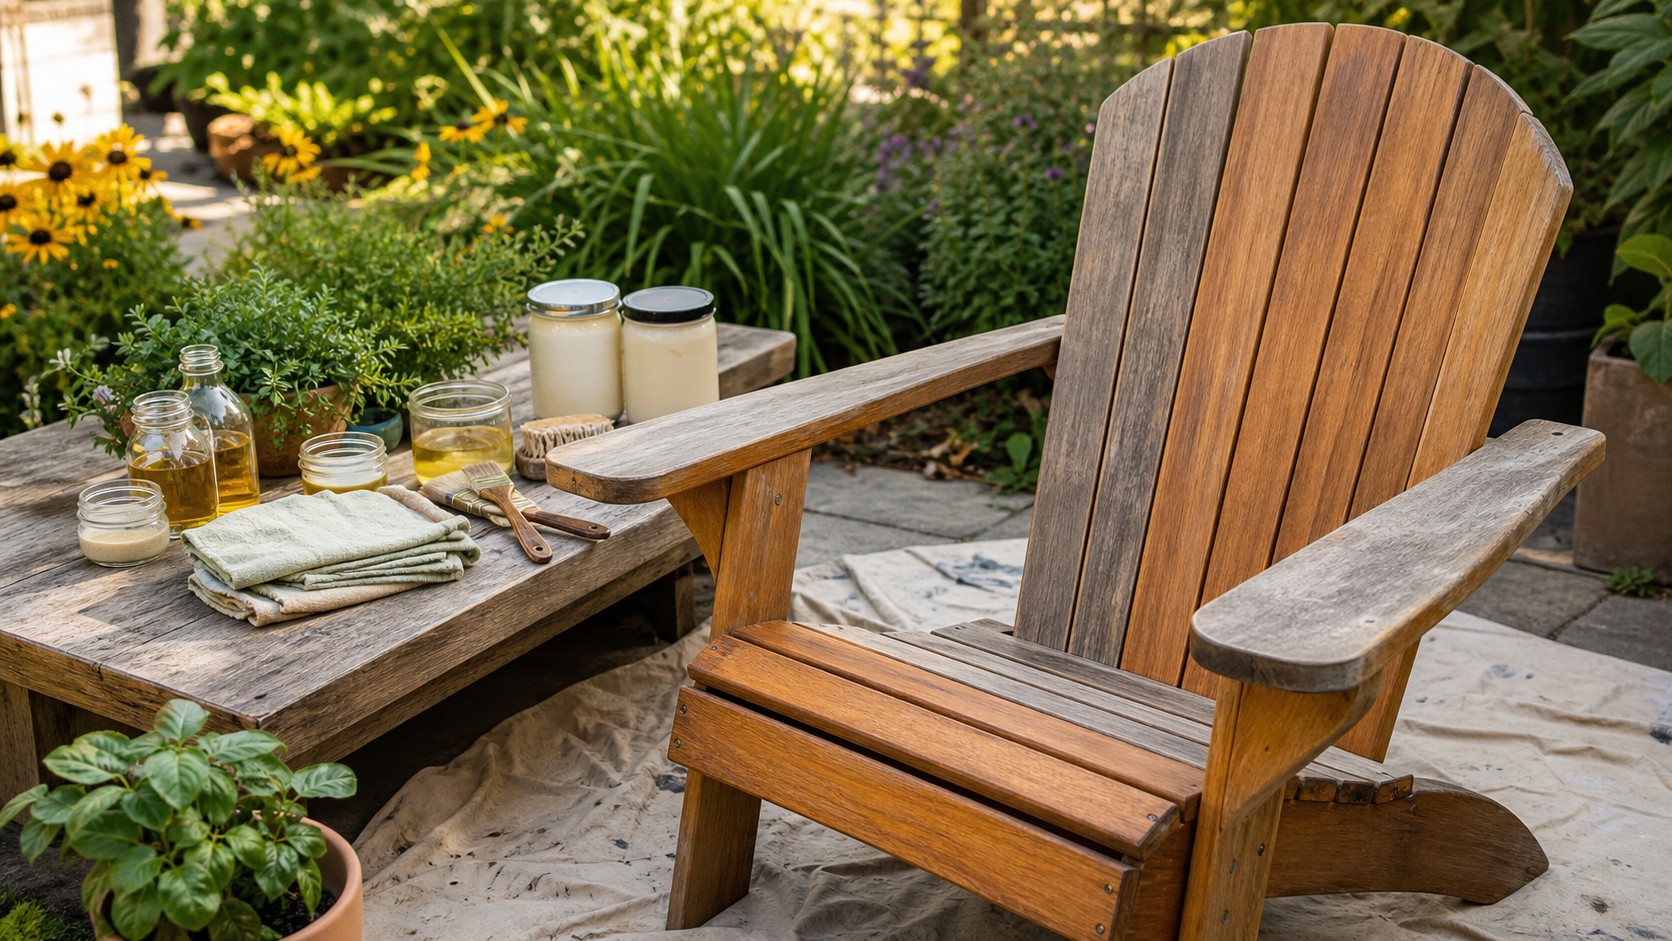
Choosing the Right Finish: Stain, Paint, Oil, or Clear Coat?
Refinishing is not only restoration—it’s design. The finish you select determines how your chair looks, smells, ages, and feels. Stain enhances natural grain and adds tone without covering the structure. It pairs beautifully with woods like cedar, acacia, and fir. You can choose transparent stain for subtle enhancement, semi-transparent for deeper color, or solid stain when you desire rich opacity but still want wood to breathe.
Paint offers the most dramatic transformation. A crisp white chair on a blue-stone patio feels coastal. A bold red chair next to a fire ring feels festive. Paint hides grain and provides uniformity, but it requires more sanding for future refinishing. Weather will eventually lift paint unless it is sealed with strong outdoor polyurethane.
Oil finishes sink deep into wood rather than creating a film on top. Tung oil, teak oil, and linseed oil nourish fibers and highlight natural grain patterns. They create a warm, satin glow rather than high shine. Oils require maintenance but are easy to refresh—no stripping needed, simply clean and reapply.
Clear polyurethane creates durability and shine, sealing the surface against rainfall. Water-based varieties dry fast and retain a lighter tone, while oil-based options deepen grain and amber warmth. Polyurethane requires a smooth substrate—every sanding mark will appear beneath gloss.
There is no wrong choice. There is only alignment with your vision: do you want to preserve texture, dramatize color, or make a finish that lasts for years with minimal care?
Applying the Finish—Slow Work, Beautiful Reward
Once the finish is selected, application becomes a rhythmic dance. For stain, brush or cloth-apply in consistent strokes with the grain, then wipe excess after penetration. Leaving too much creates tacky patches that never fully harden. One coat brings subtle character; two or three deepen richness. Stain invites mood—coastal weather-washed, dark mountain lodge, honey amber warmth.
For oil, apply generously. Let it drink in. Some woods absorb more rapidly than others. Apply again while still wet, allowing saturation. Wipe residual oil to avoid gummy buildup and allow curing between coats. Each layer adds depth. The wood begins to glow—not like varnish but like embers beneath the surface.
For paint or polyurethane, work in thin coats, not thick ones. Thick coats run, pool, and crack. Thin coats cure harder and last longer. Sand lightly between coats with 320-grit paper. This micro-sanding raises adhesion and ensures a professional finish. Three thin coats outperform one heavy coat every time.
Refinishing is not only technical—it’s emotional. Watching a dull, faded Adirondack chair transform into a renewed centerpiece evokes satisfaction that store-bought furniture cannot replicate. It becomes your chair, shaped by your hands, bearing your work.
Drying and Curing—The Patience Step Most Skip
Dry time matters more than many realize. A chair may feel dry to the touch after hours, but curing takes longer. Stain requires at least 24 hours before sealing. Polyurethane needs several days before heavy use. Oil can take a week or more to fully harden depending on temperature and humidity. Place the chair in a dry, dust-free space while it cures. Avoid stacking cushions or resting objects on it. Let the finish breathe into its final form. The patience you invest here determines long-term durability. Hurrying undermines everything you achieved.
Reassembly, Touch-Ups, and The Final Feel Test
If you disassembled your chair, now is the moment of return. Reattach slats carefully, making sure screws do not strip wood. Consider upgrading to stainless or coated fasteners—outdoor furniture benefits from hardware that resists rust. After assembly, study the chair in natural light. Look for uneven sheen, small dry patches, or sanded corners that need spot oiling. A refinishing job reaches excellence during touch-up—not in broad strokes, but in precision. Run your hand along every edge slowly. If anything feels sharp or dry, address it. A chair that feels good under the hand invites use. The feel test matters as much as the visual test.
Maintenance for Years of Beauty
A refinished Adirondack chair will last years if cared for properly. Wipe spills, avoid leaving cushions on continuously, and wash gently once or twice a season. Reapply oil yearly if using an oil finish. Check for wear on high-contact surfaces like armrests. Clear polyurethane lasts longest but still benefits from occasional cleaning and inspection. Think of maintenance not as work, but as connection. Each time you care for the chair, you prolong its story.
The Reward—A Living Piece of Craftsmanship
You began with a worn Adirondack chair. You now have a piece of furniture restored by your own effort, shaped through sanding, sealed through finishing, renewed through skill and patience. This chair will not only support you physically, but also quietly remind you of what focus can build.
The best way to sand and refinish Adirondack chairs is not merely a technique. It is a mindset: start carefully, sand thoughtfully, finish intentionally, admire deeply. You have not only improved a chair—you have elevated your outdoor space and your own capability.
Outdoor furniture ages just like people do. Weather marks it. Life uses it. Refinishing honors that history rather than erasing it. When you sit in your restored chair and feel the wood warm beneath sunlight, the reward is more than visual. It’s personal, lasting, and earned.