

DIY Classic Adirondack Chair: Step-by-Step Build Guide
Discover the joy of craftsmanship with this complete DIY Adirondack chair guide. From cutting and sanding to finishing and assembly, learn how to create a piece of outdoor furniture that blends timeless design with modern comfort. Your handcrafted chair won’t just be built—it’ll be lived in, admired, and cherished for years to come.

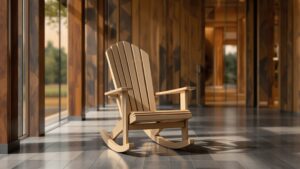
How to Build a DIY Rocking Adirondack Chair
Discover how to craft a rocking Adirondack chair that merges comfort, beauty, and motion. From cutting curves to perfecting the finish, this hands-on guide helps you shape a timeless outdoor seat built for rhythm, relaxation, and pride. Get ready to rock your porch with a chair you built from scratch!

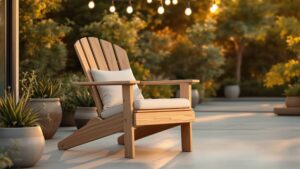
DIY Modern-Style Adirondack Chair Variation
Discover how to craft a DIY modern Adirondack chair that redefines outdoor comfort with clean lines, bold geometry, and handcrafted precision. This sleek variation turns a rustic classic into a contemporary masterpiece—perfect for patios, porches, or garden escapes. Build beauty, comfort, and style with your own hands.

Creative DIY Pallet Wood Adirondack Chair
Transform reclaimed pallet wood into a timeless Adirondack chair that radiates rustic charm and personal craftsmanship. From sanding to finishing, every step celebrates creativity, sustainability, and outdoor relaxation. Build a piece that’s both beautiful and meaningful—a handmade seat with a story as rich as its wood grain.

DIY Rustic Log-Style Adirondack Chair Build
Craft your own rustic log-style Adirondack chair—where raw timber meets relaxation. From selecting the perfect logs to shaping, sanding, and finishing, this guide turns a simple build into a masterpiece of natural comfort and craftsmanship. Sit back and enjoy the charm of your hand-built outdoor icon.
Creative DIY Adirondack Rocker for Porches
Bring timeless porch charm to life with a handcrafted Adirondack rocker. This inspiring, step-by-step guide blends smart design, outdoor durability, and creative styling ideas to help you build a comfortable, eye-catching piece made for slow mornings and golden hour evenings.
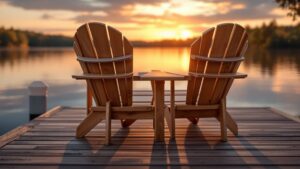
DIY Double/Loveseat Adirondack Chair Project
Transform your backyard with a handcrafted double Adirondack loveseat built for comfort, durability, and timeless style. This detailed DIY guide walks you through design, materials, assembly, and finishing so you can create a beautiful two-person outdoor chair perfect for patios, porches, and waterfront views.
DIY Compact Adirondack Chair for Small Patios
Transform your backyard with a handcrafted double Adirondack loveseat built for comfort, durability, and timeless style. This detailed DIY guide walks you through design, materials, assembly, and finishing so you can create a beautiful two-person outdoor chair perfect for patios, porches, and waterfront views.

Creative DIY Adirondack Beach Chair Variation
Reimagine a timeless classic with a creative DIY Adirondack beach chair variation built for sand, sun, and sea breezes. Discover smart structural upgrades, durable coastal materials, and stylish design twists that transform a traditional Adirondack into a lightweight, beach-ready statement piece you can proudly build yourself.